There are multiple schools of thought about when and how should SQL migrations be run during the release process. Some people suggest to let the app apply the migrations at runtime, but this might not be the best option to take if you're not running a database local to the app itself.
We wanted to keep the concerns separate and instead generate migration scripts in our build steps and then separately run them against our SQL database in the release pipeline. This was fairly straightforward on paper, but in our situation turned out to include some gotchas I was not aware of before.
Code
Quoting MS Documentation: Some of the EF Core Tools commands (for example, the Migrations commands) require a derived DbContext instance to be created at design time in order to gather details about the application's entity types and how they map to a database schema. In most cases, it is desirable that the DbContext thereby created is configured in a similar way to how it would be configured at run time.
Obviously, Migrations commands are what we need. More specifically this command:
dotnet ef migrations script --startup-project <PROJECT> --Context <CONTEXT> --Configuration <CONFIG> --output <PATH> --idempotent
In short, we specify the startup project path and if needed, project path with --project (both default to the folder where the script is run), then the name of the context, configuration and where to place the script. And most importantly the --idempotent flag to make sure the script can be run multiple times. This command also builds the project by default, so you may opt to use --no-build as well.
In our solution the DbContext is tried to be created from Application Services, as described in the documentation linked above. What the documentation does not directly mention is that to create the required DbContext, a connection string is required to be given and that Program.BuildWebHost is implicitly called with an ASPNETCORE_ENVIRONMENT setting of "development" as discussed in this issue. When it is spelled out, it seems very obvious, but this took me a while to figure out.
We did not want any hard coded connection strings in the repository and all our app settings are coming from either a Keyvault or the App settings of the Azure Web App, so while I was successful in creating the migration scripts locally, the absence of a connection string caused some issues in running the same command on the Azure DevOps hosted agent.
System.ArgumentNullException: Value cannot be null.
Parameter name: connectionString
Build Pipeline
.NET Core is multi platform, so you should be able to run the commands on any of the Microsoft hosted build agents in Azure DevOps. We run our builds on the win-2019 agent and have not tested this on any of the Linux based ones.
Installing necessary tools
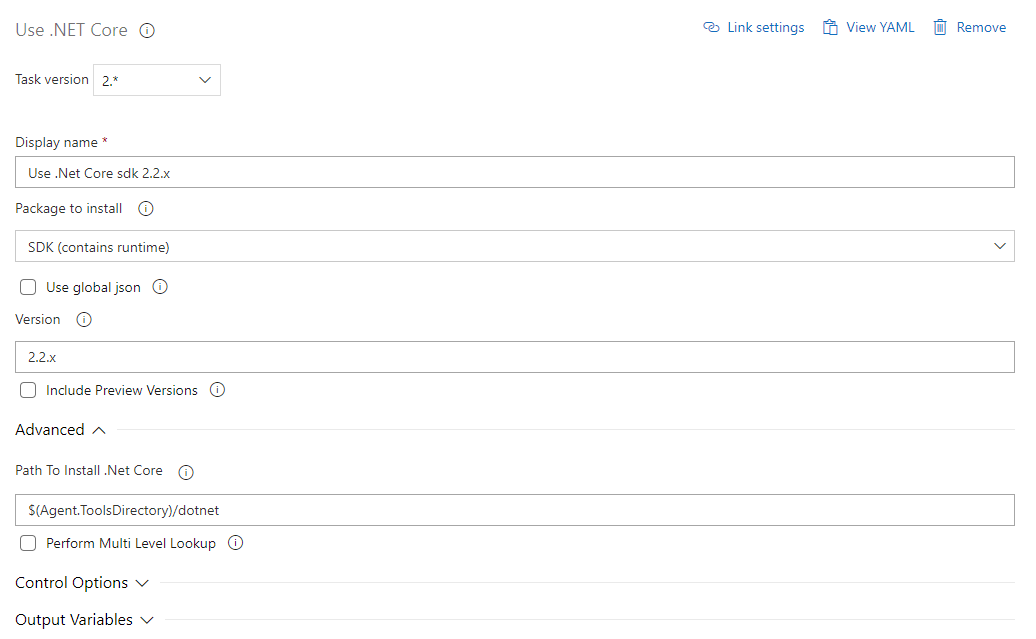
First of all, we need to make sure that the agent has the required tooling installed on the agent. The win-2019 agent has .NET core 3.0 installed by default, but to make sure that you have just the version you want, you can use this task to install a specific one. I ended up just skipping this part myself, but below is an example configuration for 2.2.x.

.NET Core 3.0 no longer includes dotnet ef command line tool as part of the core SDK, so depending on the version you choose you might need to install the tooling for that too. You can accomplish this by running the following command in a script task (like a powershell task for example)
dotnet tool install --global dotnet-ef --version 3.0.0
Without this, you might run into the following error later:
Could not execute because the specified command or file was not found.
Possible reasons for this include:
  * You misspelled a built-in dotnet command.
  * You intended to execute a .NET Core program, but dotnet-ef does not exist.
  * You intended to run a global tool, but a dotnet-prefixed executable with this name could not be found on the PATH.
Setting Env Variables
Now we're ready to make sure the script generation command gets the connection string during the build run. Any valid SQL connection string should be able to create the required script, as long as the parameter is not empty.
Because we did not have any app setting files that the code could fetch the connection string from, I ended up using user secrets to set the required values for the project during the run. Depending on what your connection string setting is named, you will need to modify this a bit. Below are examples of our implementation. Note that user secrets are set in the folder where the project is located and that you might need to run dotnet user-secrets init first.
Startup.cs:
services.AddDbContext<MyDbContext>(options => options.UseSqlServer(Configuration["MyApp:SqlServer"]));
Build Pipeline script (Azure CLI task):
cd $(Build.SourcesDirectory)\MyApp.Api

dotnet user-secrets set "MyApp:SqlServer" "Server=(localdb)\\mssqllocaldb;Database=MyDatabase;Trusted_Connection=True;MultipleActiveResultSets=true;"
Bringing everything together
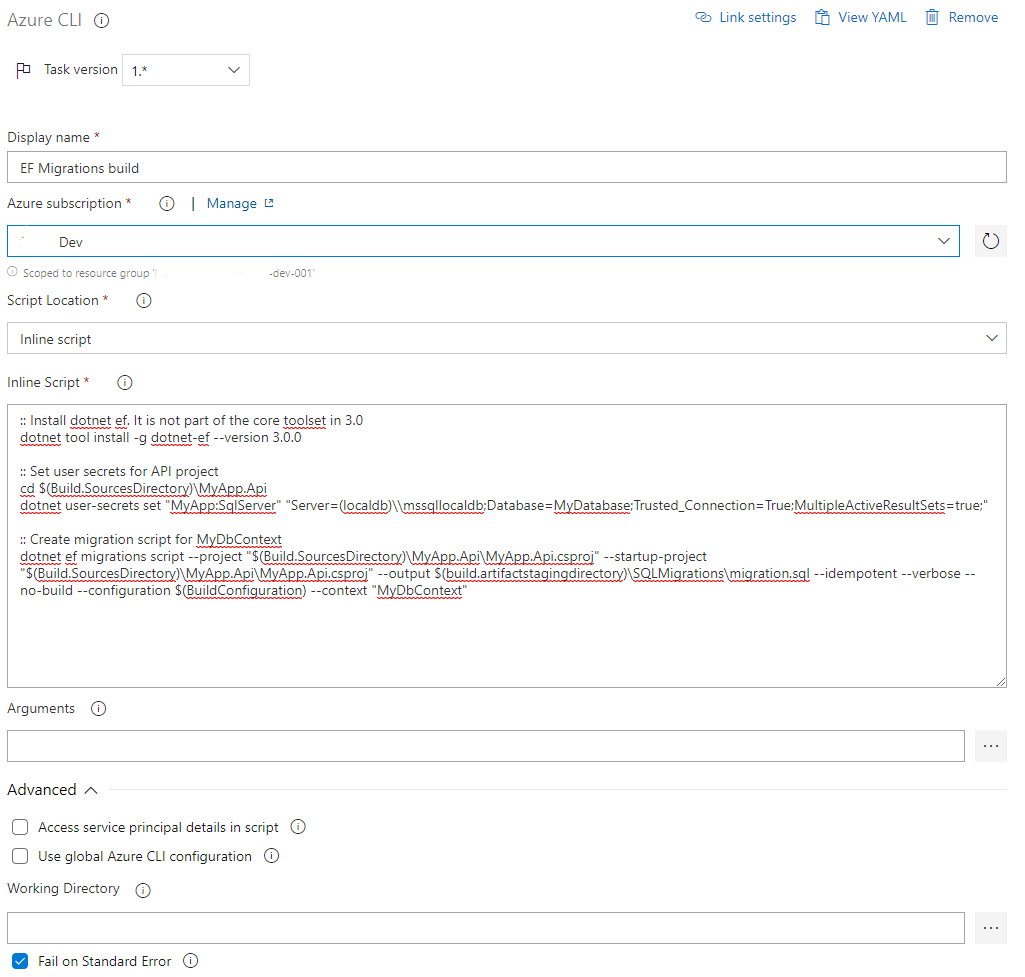
Only thing remaining is to create the scripts. I ended up just adding most of these tasks into a single script. The Azure CLI task was used as it uses the service principal to log into Azure, which allows an access token to be used. This might be useful when switching to a Managed Service Identity based approach for SQL, which we will be doing soon.
Here's the full script I'm running. Best practice would be to add this file to source control, but for brevity I'm doing it as inline:

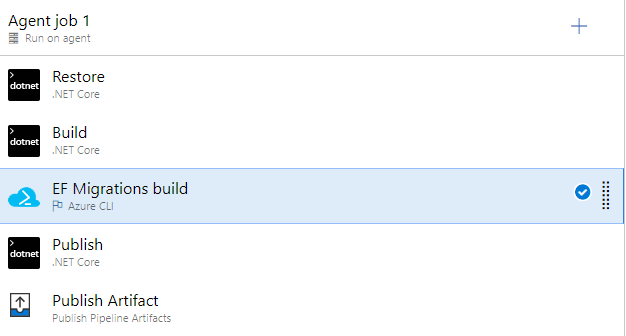
And lastly, here's an overview of the whole build pipeline. We of course run the Publish Pipeline Artifact task last to be able to use the resulting files in a release pipeline.

Release Pipeline
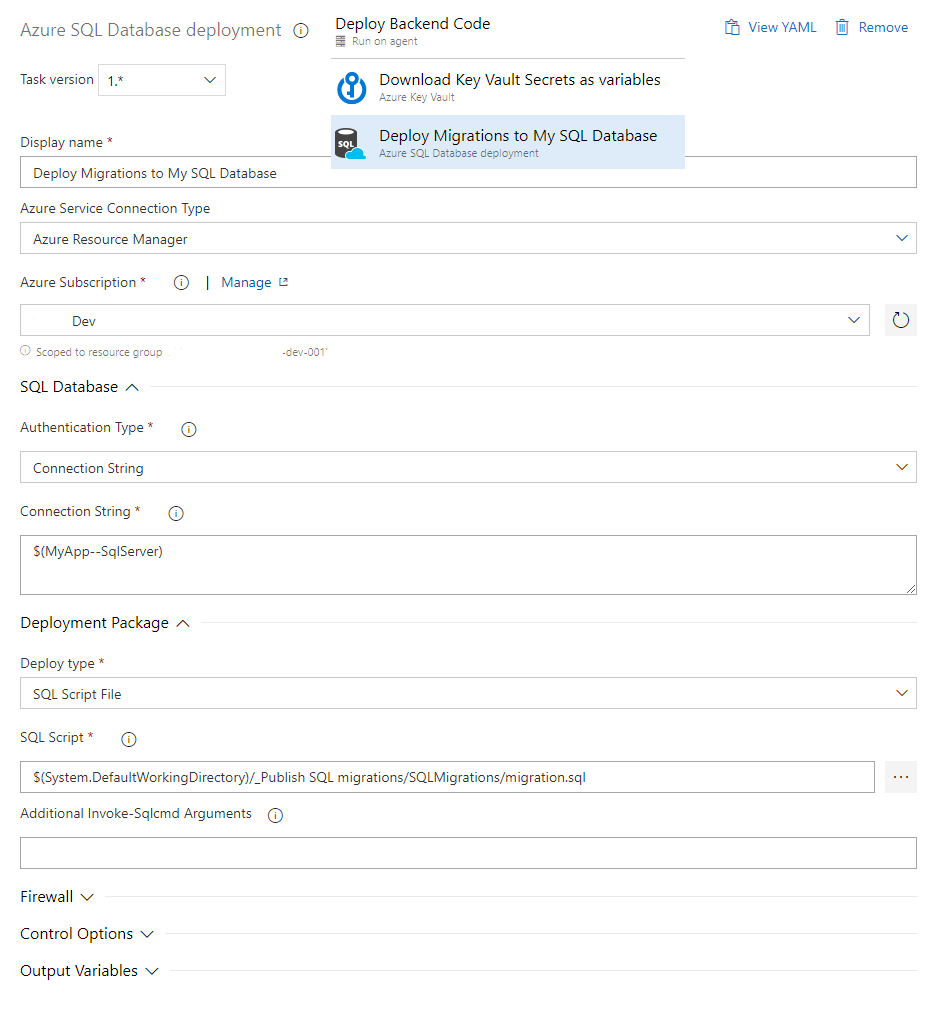
To actually run the migrations created, I use the Azure SQL Database deployment-task. If you want, you might just as well use powershell to do the same.
Below are the example steps I currently use. I load the real connection string from a Key Vault first using the Azure Key Vault task, and then use the downloaded secret value for the migration run.

And that's it!